Integrate Salesforce with Evergiving
Follow these straightforward steps to connect Salesforce and Evergiving for seamless data synchronization. This setup is straightforward and only needs to be done once. The primary objective is to create and configure a Salesforce Connected App, obtain the necessary credentials, and establish the connection within Evergiving to enable data flow.
Out of Scope: Custom object mapping and data flow configuration, which are managed by the Evergiving Support Team.
Prerequisites & Assumptions:
- Access: You must have a Salesforce System Administrator profile.
- Knowledge: Basic familiarity with Salesforce Setup navigation is required.
- Environment: Decide whether you are setting up in a Production (
https://login.salesforce.com/) or Sandbox (https://test.salesforce.com/) environment.
Enable Connected Apps
Connected Apps are disabled by default on all new orgs, so enable them first in Salesforce.
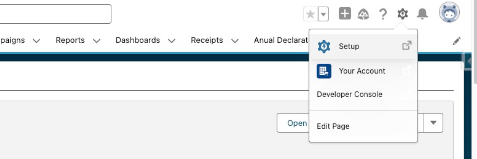
Go to Setup -> Search "External Client Apps" or "App Manager"
Toggle "Connected Apps" to ON

Create a Connected App
On the same page press the New Connected App button to start. Fill in the fields:
- Connected App Name: insert the name you want to associate to the connected app. The name must be unique.
- API Name: auto-complete - It defaults to a version of the name without spaces
- Contact Email: insert the user you want to associate to the connected app
Consult the Salesforce Guidelines if needed.

✅ Check "Enable OAuth Settings"
Callback URL: Use https://login.salesforce.com (Production) or https://test.salesforce.com (Sandbox)
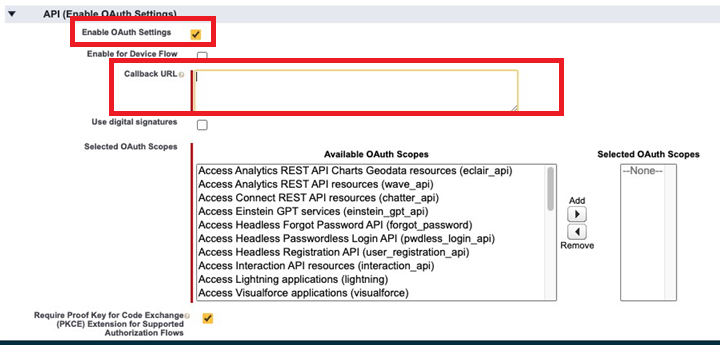
- In the Selected OAuth Scopes add:
- Manage user data via APIs (api)
- ❌ Uncheck "Require Secret for Refresh Token Flow"
- ✅ Check "Enable Client Credentials Flow"
Consult the Salesforce Guidelines if needed.
Custom Connecter App Handler
In this section select the user.
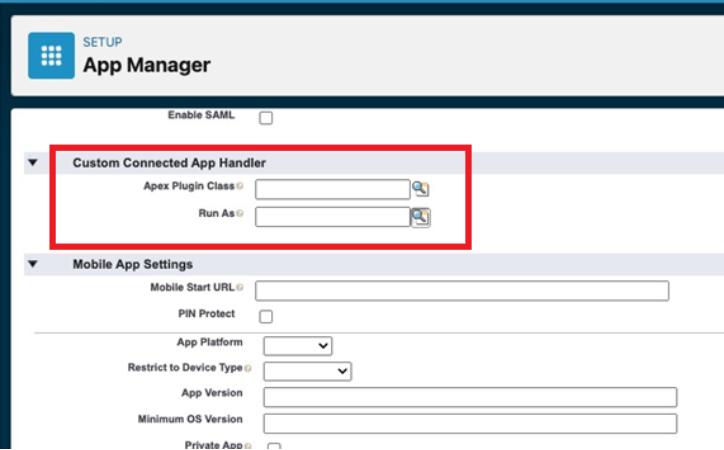
Click Save.
Your Connected app is now created!
Configure the Connected App
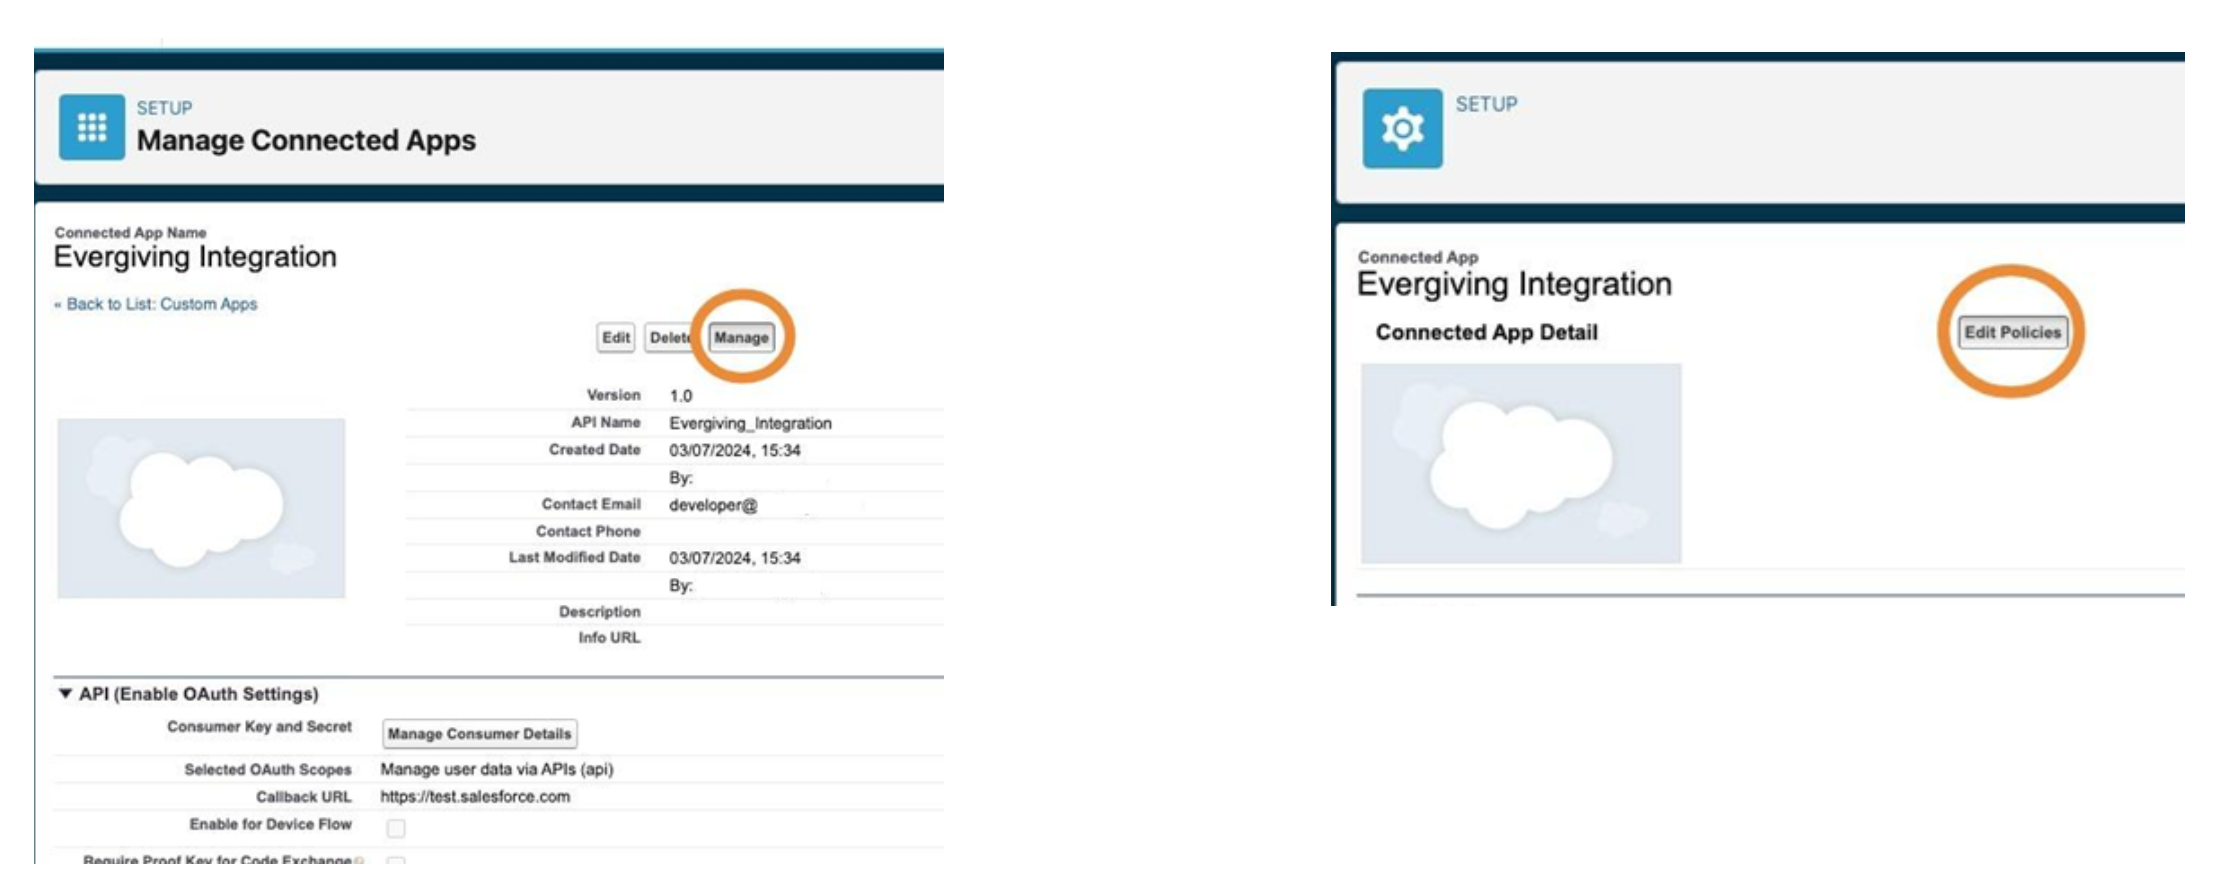
Select the created connected app in the App Manager view.
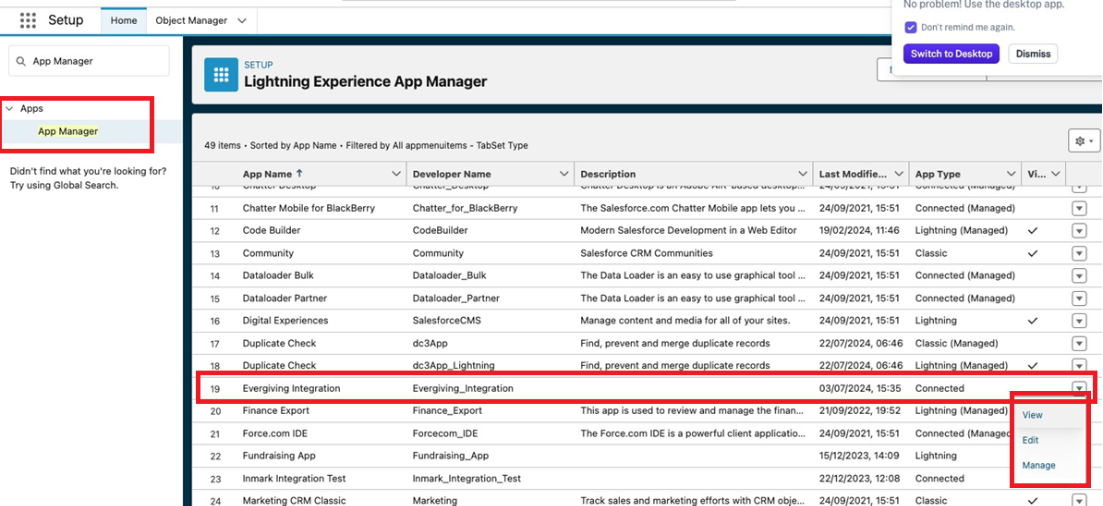
Click Manage then, Edit Policies
Set Access Policies:
- Go to Manage → Edit Policies
- Set to "Admin approved users are pre-authorized"
- Set IP to "Relax IP restrictions"
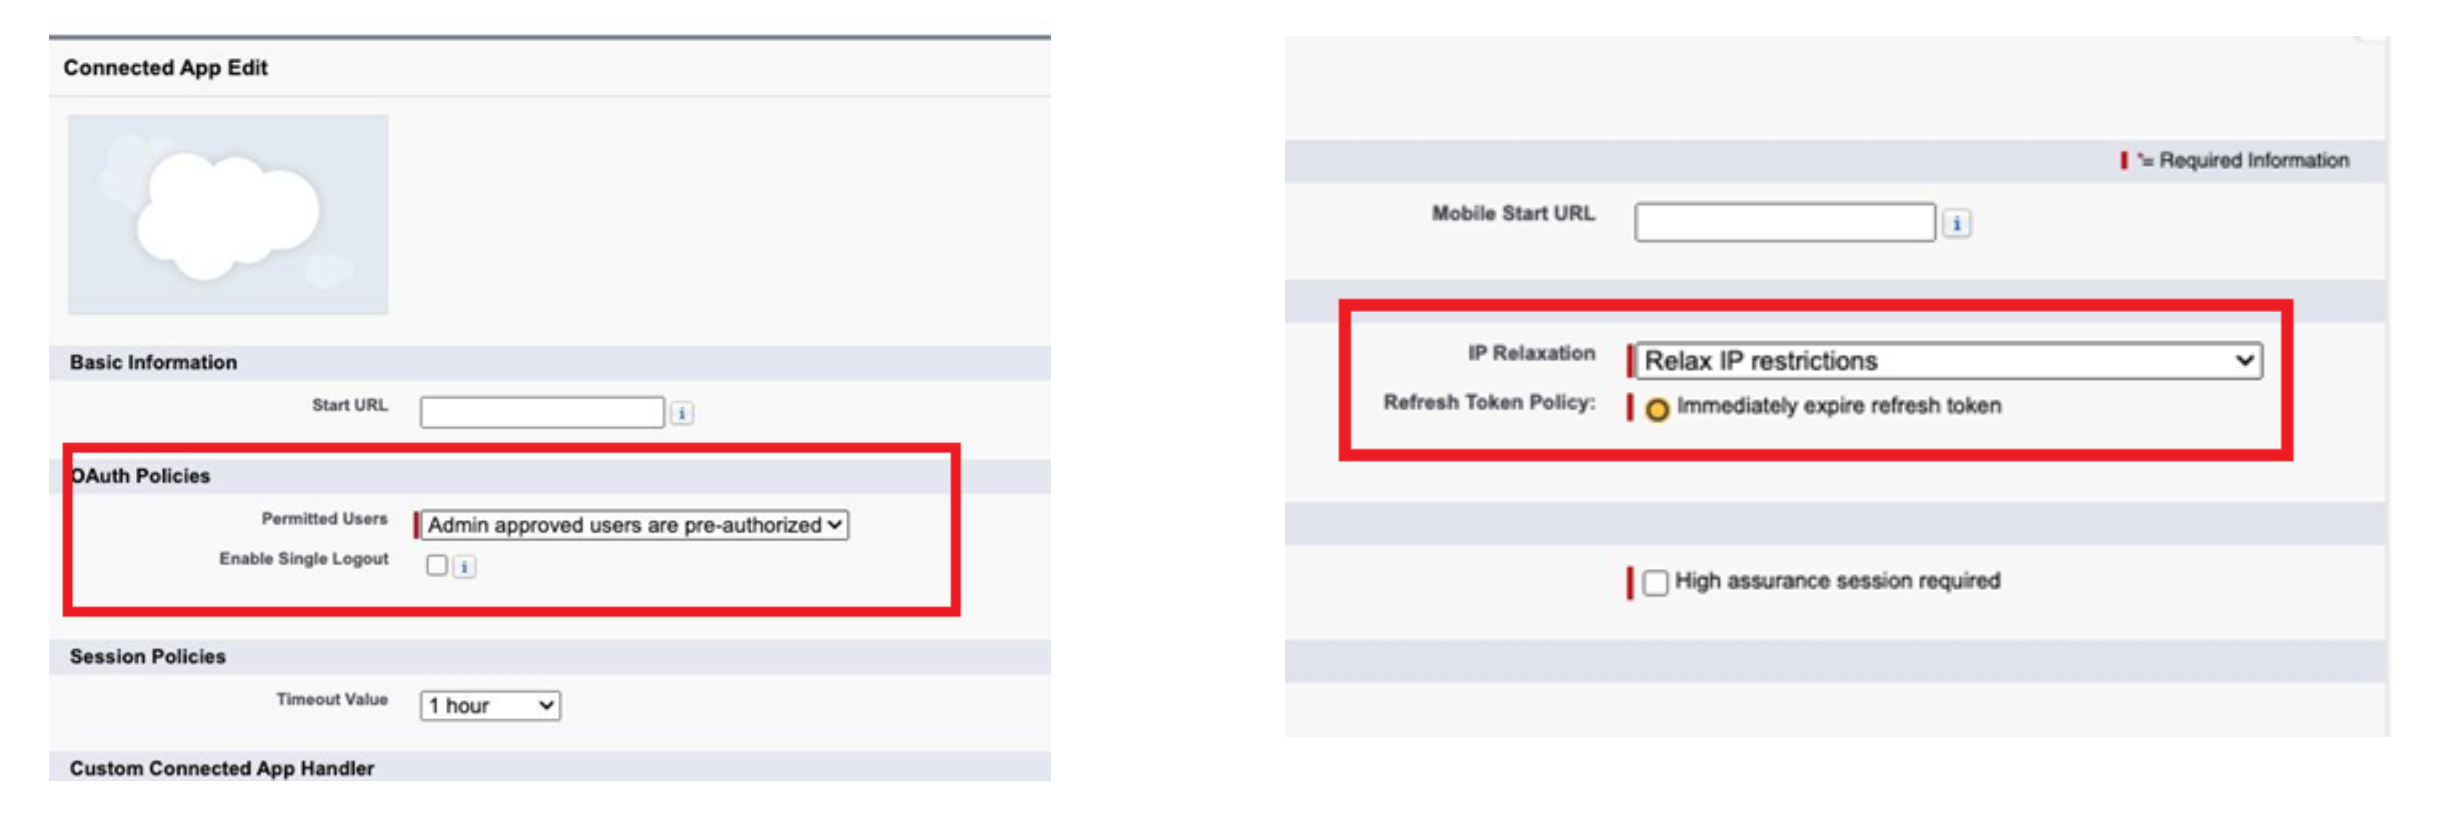
Set Session Policies
Click this dropdown and set a 1 hour default. This value may vary depending on the intended purpose.
Custom Connected App Handler
Select the user.
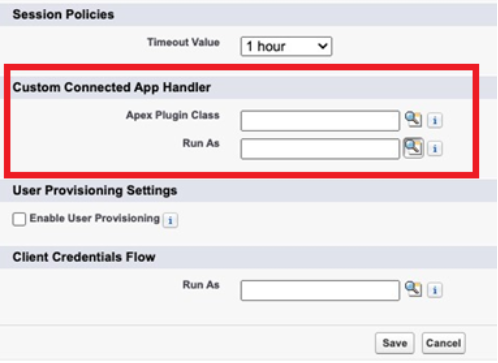
Client Credentials Flow
Also select the user.
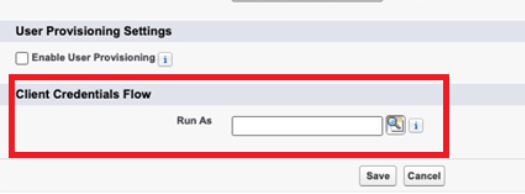
Finally press Save.
Set Connected App Permissions
This step is designed to configure the access permissions for the connected app.
Go to the Profiles section and click "Manage Profiles"
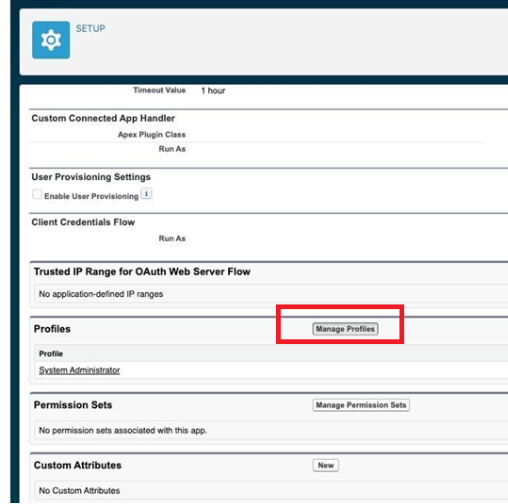
Select the profiles you want to give permissions to and press Save at the bottom right corner.
Get Connected App Credentials
Click View on selected App.
- Get Your Credentials:
- Click "Manage Consumer Details"
- Copy the Consumer Key and Consumer Secret

Copy these as they are needed on Evergiving's end.
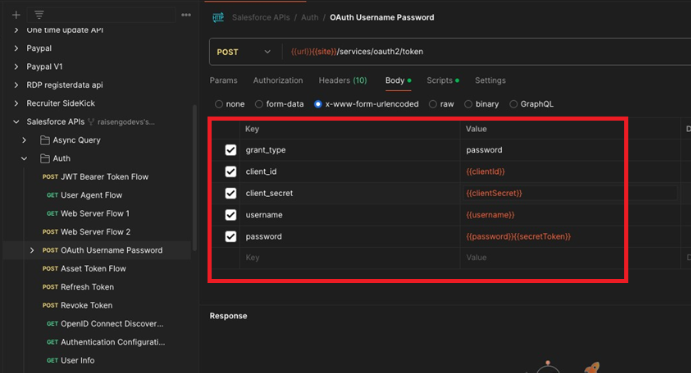
Check the connection
You can check that the Connected App is working correctly by using a tool like Postman. After filling in the credentials, click Send, a response will appear indicating whether the authentication was successful or unsuccessful.
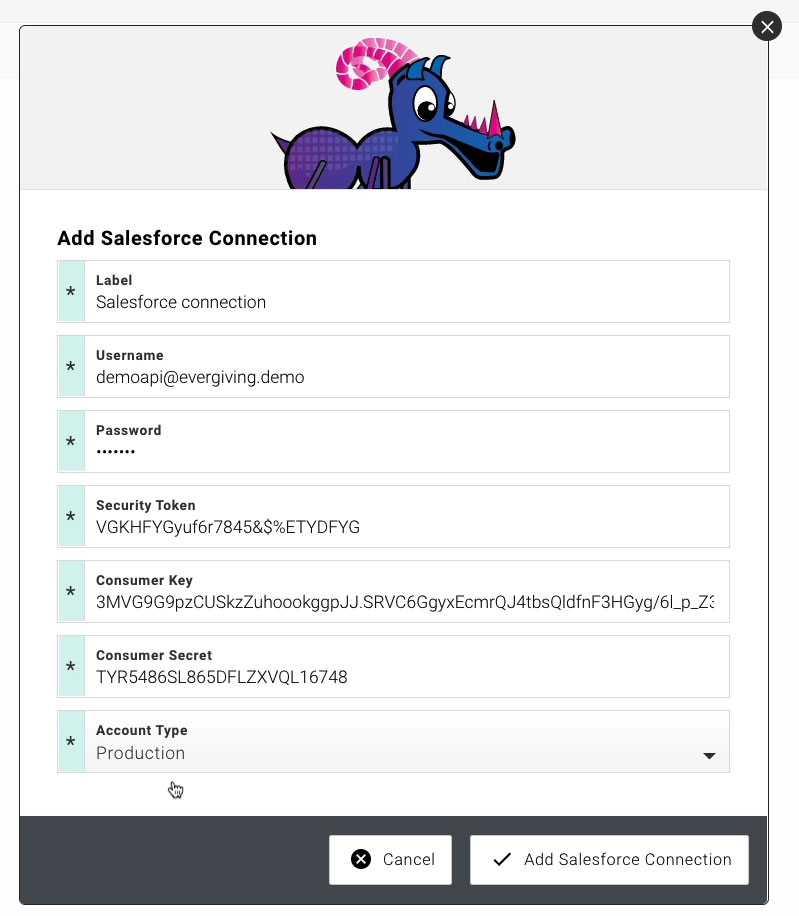
Enter Credentials in Evergiving
Now, bring your Salesforce credentials into Evergiving to complete the connection.
What You'll Do:
- Log in to your Evergiving account
- Go to Account -> Salesforce
- Click "Add Salesforce Connection"
- Fill in the credentials you previously created in the pop-up window: Username, Password, Security token, Consumer Key and Consumer Secret
- Select the account type : Production or Test
- Click "Add Salesforce Connection" to save
Our support team can review your connection to ensure everything looks perfect.
Warning
If you reset your Salesforce user password, you'll need to generate a new security token and update it in Evergiving. Considering the strength of Evergiving’s security protocols, we do not recommend changing the password more than once a year. After resetting the password and security token, these need to be updated in Evergiving.
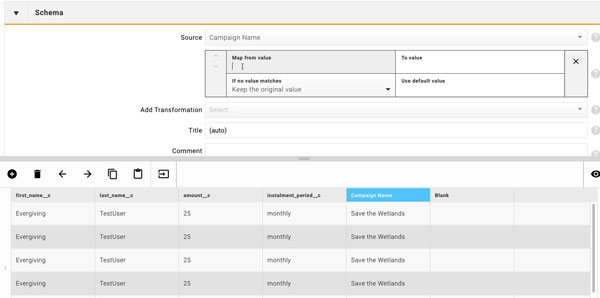
Map Your Data Fields
The final step is to define how your data flows between the platforms. Our support team will handle the technical setup for you.
What We'll Do Together:
- You provide: the object name, the API names of column headers of the schema, as well as the definition and constraints of expected values for each column
- We handle: The technical configuration and object mapping
- We schedule: A setup call to test everything together
Tip
We highly recommend testing your data flow in a Salesforce Sandbox first before going live in Production. This allows us to test the flow and the schema without impacting your active CRM.