Importing Data
Evergiving supports the importing of data using CSV and Excel files, for a number of different use cases:
| Import Type | Location | |
|---|---|---|
| Import Leads | Import > Leads and Pledges | For use in the call center or residential fundraising features |
| Update Leads | Import > Leads and Pledges | For use in the call center or residential fundraising features |
| Update Pledges | Import > Leads and Pledges | Including validation outcomes |
| Create call records | Import > Leads and Pledges | Creating call records against leads or pledges |
| Import Cancellations | Import > Leads and Pledges | |
| Import Do Not Call Lists | Import > Leads and Pledges | |
| Import Payments | Retention > Payments Import | |
| Import Locations | Import > Locations |
Note
To import fundraisers, agents and teams use the Evergiving API.
The workflow is :
Prepare for import
Please read the following carefully before importing data.
Pre-flight Checklist
- To import data, you must have Admin Operations permissions with read and write access to Imports.
- You can use
CSVorXLS/XLSXformats. You might find it easier to use XLS/XLSX. - Supporter Country Code - is
ISO 3166https://en.wikipedia.org/wiki/ISO_3166 or https://www.iso.org/iso-3166-country-codes.html e.g. 'US’, ‘GB’ or ‘AU’ - Phone numbers will be validated on import using the Supporter Country Code. Evergiving will detect the national phone format and if you have dropped leading zeroes in your import add them back. Invalid numbers will reject the row.
- Dates are all
YYYY-MM-DD, as per ISO 8601 https://www.iso.org/iso-8601-date-and-time-format.html - Boolean values are ‘Yes’/’No’ or ‘True’/’False’
- Currencies are
ISO 4217https://www.iso.org/iso-4217-currency-codes.html e.g.USD,EUR,GBP - All validated values are case insensitive e.g. you can import
TRUE,Trueortrue;USDorusdetc - Timezones are values in the tz database https://en.wikipedia.org/wiki/List_of_tz_database_time_zones e.g.
America/Toronto,Europe/London, orEtc/GMT+5 - Payment methods allowed are Card (or value contains ‘card’), Direct Debit (or value contains ‘bank’), Wallet, and Other. You can then add anything you like in the payment method type column, e.g. ‘PayPal’ or Apple Pay for ‘Wallet’
Evergiving Import Fields
Evergiving has a set list of fields that can be imported/updated into. An updated list can be found here on Google Docs:
Click through the bottom tabs to find the relevant import fields.
Upload File
Importing in any of the areas is done by either dragging a CSV or XLS/XLSX in to or clicking on the Drag and Drop Field. We recommend that you use an Excel file as they are easier to edit than a CSV file. When dealing directly with a CSV, it is easy to inadvertently introduce an error into the file that can cause the import to fail.

The files hold an entry for each row and contain different headers for each column. The columns can be in any order, however depending on the import task, some columns and fields may be mandatory, check the sections below.

Tip
Give your import file a meaningful name as it will be visible within the system.
Map Headers
Evergiving will recognise the header row in your file and map the columns to fields in Evergiving automatically, where they match.

Where your header is not recognised as matching a system field in Evergiving, you can use the drop down to choose the correct field. You may not map two headers to the same field.
After changes press:
This will update the Valid or Invalid Rows preview sections below
Script and Export
If a header in your file does not match a column, it will automatically be mapped to and then added into the ‘Script and Export’ column, the message will show:
[field name] does not match a system field in Evergiving.
Choose the correct column, or proceed to add this data to the 'Script and Export' column.
It will be hidden, but available to merge fields in call scripts, and to exports.
You can have multiple fields mapped to ‘Script and Export’, they will be added to the database in a JSON string with {key}:{value},{key}:{value} e.g. {fruit}:{banana}, {color}:{blue} and the keys can then be used in call scripts and to populate columns in exports.
Ignore this column
You can also choose to ignore any column's data in your file by choosing Ignore this column. The header will be ignored on import.
Preview
After a short delay the system will display a preview of your import. At this point, no data has been entered into the system and you have the opportunity to review the results.
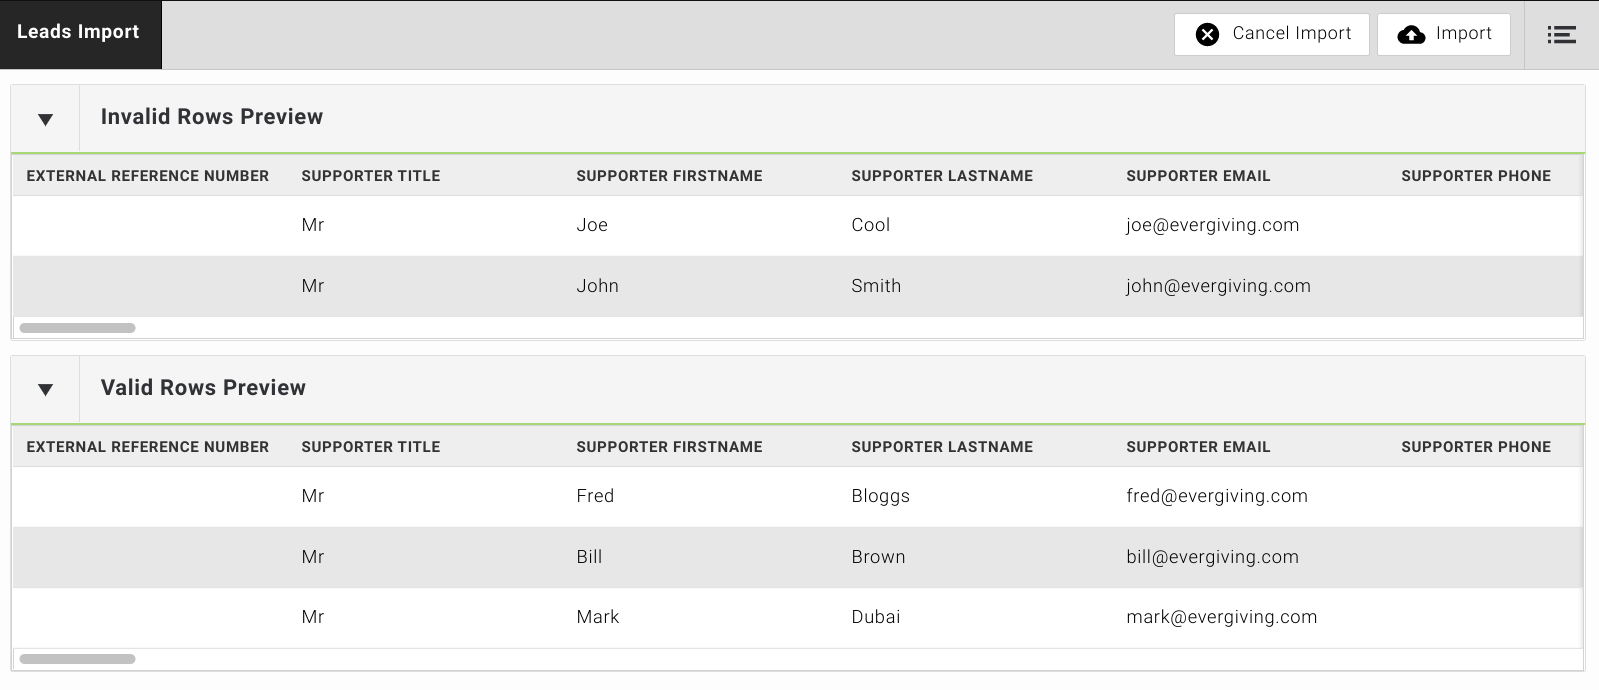
The Preview pane is divided into two parts, with the top section showing the rows of your import file that are Invalid and the lower section showing the rows that are Valid.
The entries in your file are listed with each value listed in the appropriate column.
In the example import below we can see that some entries have been classified as Invalid and some as Valid.

Invalid Rows Preview
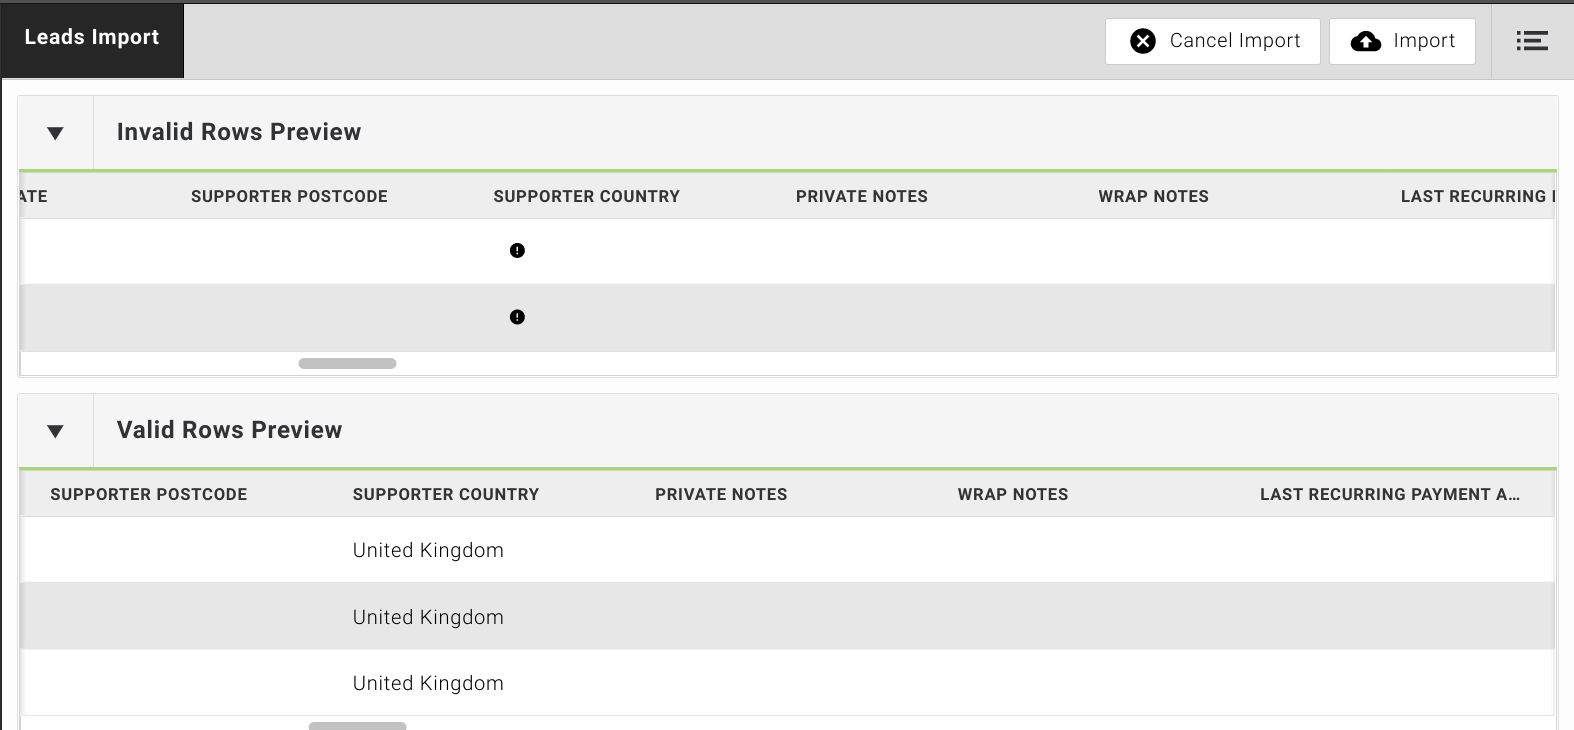
Evergiving will run checks on your file and may reject some or all rows if there is an error. To see the errors, scroll horizontally to the column with an (!) icon to check the error before fixing and resubmitting the file.
In this example import we can see that the Supporter Country column has invalid data. This is because the Supporter Country Code column is mandatory and the data file used for this import had two entries where the Country code was not provided.

You are given the opportunity to ignore invalid rows after pressing Import.
Valid Rows Preview
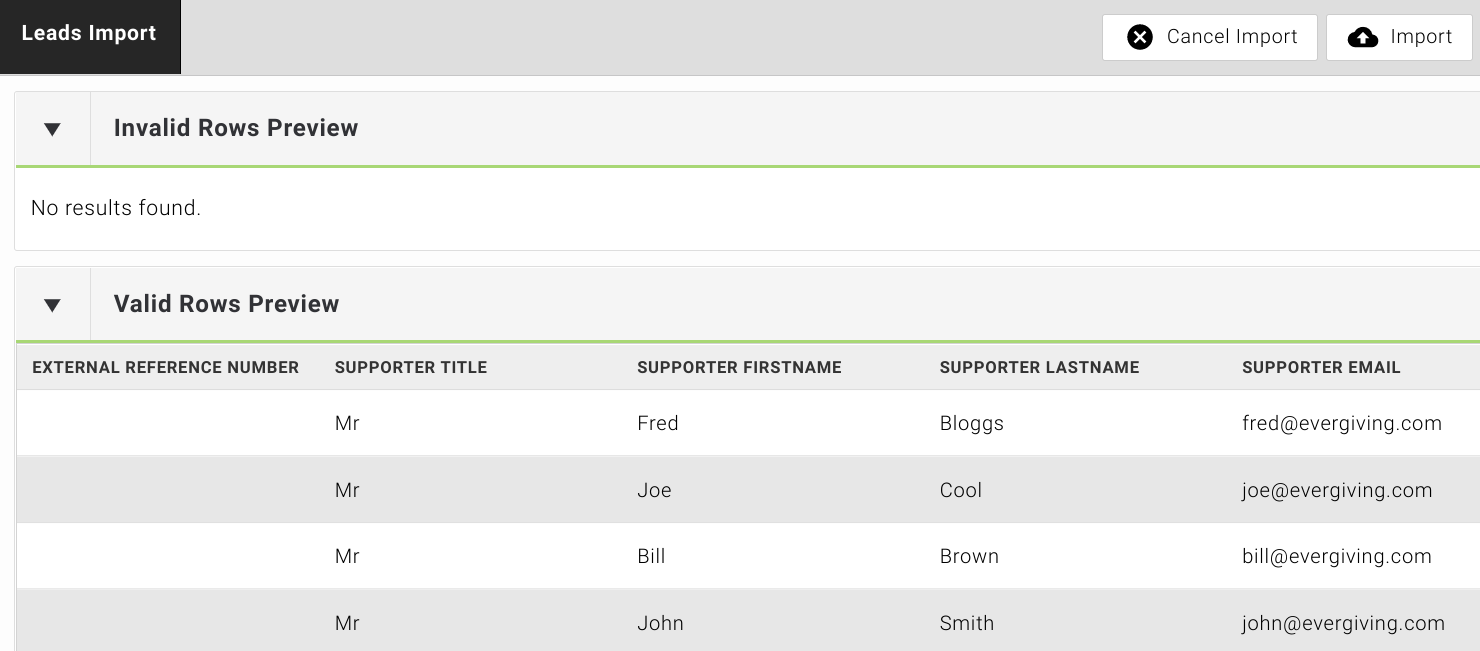
In the example below, no entries are shown in the Invalid pane. This means that all of the entries in the import file conform to the required specification and all data can be imported safely.

The Valid Rows Preview will preview up to 500 records.
Import
When you are happy with what the preview shows, press the button on the top right:

Invalid rows
This window gives you the opportunity to ignore invalid rows and only import valid rows if you wish.
Import Duplicates
On the last step before importing, you will be given the option to ‘Import Duplicates’.
Where you have specified a Campaign, the import will look for duplicates on:
name
date of birth
phone number
email address
Including or excluding them if another record in that campaign matches.
Where you have not specified a Campaign, the import will look for duplicates on
name
date of birth
phone number
email address
Including or excluding them if another record in your entire account matches.
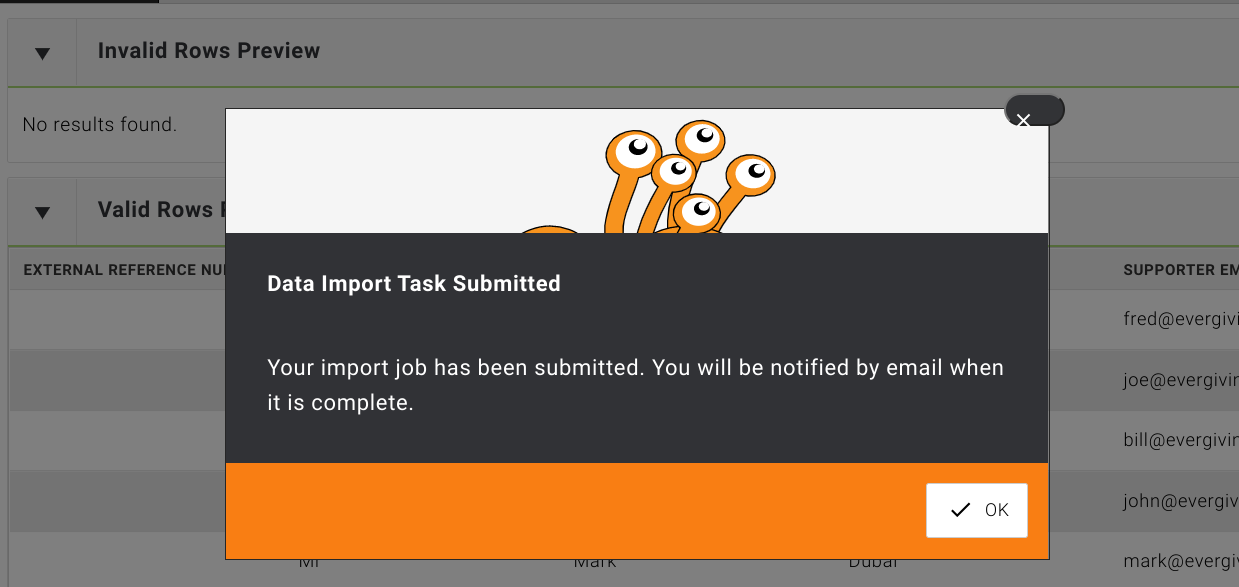
Data Import Task Submitted
The system will inform you that the import task has been submitted and you will receive an email when it has been completed.
If there are any invalid rows, a CSV file is also attached with those invalid rows.

Import Types
Import Leads
For use in the call center and residential fundraising.
To import new leads, these columns are mandatory and cannot be empty. Any other column is optional:
Supporter First Name
Supporter Last Name
Supporter Country Code
Note
As soon as you make a change to a record in a lead import, i.e. you log a call attempt or save a change to a field, you can no longer delete the lead import. You can then make it 'inactive’.
Update Leads
To update Leads, use the same process as above just include the:
Pledge ID (Lead ID)
There are no other mandatory columns. Any column you include will overwrite the record.
Note
Any update to the Script and Export will update all the data in that column.
Update Pledges
Update pledges including validation outcomes.
To update Pledges, include the
Pledge ID
There are no other mandatory columns. Any column you include will overwrite the record.
Note
Any update to the Script and Export will update all the data in that column.
This import supports Validation Outcome workflows. Importing a validation outcome will change statuses and contact made according to the settings of that validation outcome. You can override the contact made change if you wish, by importing a value in that field. You cannot change the status change that a validation outcome will apply, the two are linked.
The following columns are required:
Validation Outcome (must match exactly the name of a validation outcome in your account)
Validated By Username (any user’s username)
Validated At (YYYY-MM-DD)
Create call records
Create Call records against leads or pledges. You can create a call record using the import. This can be used to bulk update leads for the call center, to change their status.
The following columns can be used to create a call record:
Private Notes (optional text, will overwrite all notes)
Wrap Notes (optional text, will overwrite all notes)
The following columns are mandatory:
Pledge ID
Call Username
Call Datetime
Call Outcome
| Column | Example | Description |
|---|---|---|
| Pledge ID | ||
| Call Username | Any user’s username, does not have to be an agent - you can have one spare user for this or use an admin operations user, your own username is fine - you will be able to search these calls using the username | |
| Call Datetime | 2026-02-09T04:02:40 |
YYYY-MM-DDTHH:MM:SS |
| Call Outcome | Must match Evergiving's Call Attempt Outcome - It'll automatically create a call with the corresponding status ['abandoned', 'answer_machine', 'busy', 'no_answer', 'voicemail_left'] = 'pending' ['callback_agent', 'callback_queue'] = 'callback' ['invalid_number', 'disconnected', 'telco_error'] = 'remove' ['do_not_call'] = 'do_not_call'" |
|
| or | ||
| Final Call Outcome Label | Must match a Final Call Outcome in your account. |
Import Cancellations
Importing cancellations works like a pledge update import. The data should be in the following format:
Pledge ID
Cancellation Date (YYYY-MM-DD)
Cancellation Reason
The date and reason for the cancellation will be automatically recorded against the correct pledge and the status will change to Cancelled.
Note
Any new reasons you import will simply add to the list of cancellation reasons recorded in your account. We strongly recommend restricting the reasons to simply “Actively Canceled” (the supporter contacted the charity and requested their donation stop); and “Passively Canceled” (the supporter is considered canceled due to failed delinquency procedures and a period of time without payment).
Import Do Not Call Lists
Import > Leads and Pledges > Do Not Call List Import
You can import a file to create call records against a lead or pledge with the status of Do Not Call. This will prevent the record being called and can be used to update the record with notes.
The columns you can import are:
Email
Phone Number
Country Code
Private Notes
Wrap Notes
A phone number or an email address is required in each row
Country Code can be provided to validate numbers outside your account locale
Phone numbers will be searched across all phone number fields
Invalid numbers will be shown in the preview if your file is less than 5,000 records. We do not recommend importing files larger than 5,000.
Import Payments
To use EARN to its full potential you simply need to upload your recurring pledge payment data into your Evergiving account cross-referenced with the Evergiving Pledge IDs. If you have instant payments enabled on your campaign then those payments will populate the first payment record and begin the EARN 1 calculations from that day. Otherwise the calculated pledge start date will be used to calibrate the date from which EARN 1 will be anchored.
The upload procedure is very simple. Drag and drop a spreadsheet containing three, optionally four, columns:
Pledge ID
Amount
Payment Date (format DD.MM.YYYY)
Attempted Payment Date (optional)
The date and payment amount will be automatically recorded against the correct pledge and will sum to the amount on the Fundraiser’s dashboard logs.
Import Locations
You can manually create Team locations with the following columns:
Name
Status
| Column | Description |
|---|---|
Name |
Name of the location. Must be unique. |
Status |
"Active" or "Inactive" |
Latitude |
Latitude of the location |
Longitude |
Longitude of the location |
Data |
Use this column to import Key/Value for the location. Please respect the format in the example below |
If you import an already existing location, it will not be imported.
If you import a location and it is already in the system with a different status (Active/Inactive), it will be imported.
It is currently not possible to update data of locations at the moment by importing a new file with new data.
Example of format to import locations
Name,Status,Latitude,Longitude,Data
10004 - Berlin - Landersbergallee,Active,,,"[{""key"":""TicketPreis"", ""value"":""0.6""},{""key"":""Fahrzeit"", ""value"":""0.15""}]"