Setup Power BI Integration
Follow this step-by-step guide to connect Power BI to your Evergiving data using an ODBC driver.
Step 1: Download and Install the ODBC Driver
- Download the latest version of the PostgreSQL ODBC driver:
- Install the ODBC driver on your system.
- Restart your computer after the installation is complete.
Step 2: Download and Install Power BI Desktop
- Download Power BI Desktop:
- Install Power BI on your computer.
Step 3: Open the ODBC Data Source Administrator
- Open the command prompt.
- Type
odbcad32and press Enter.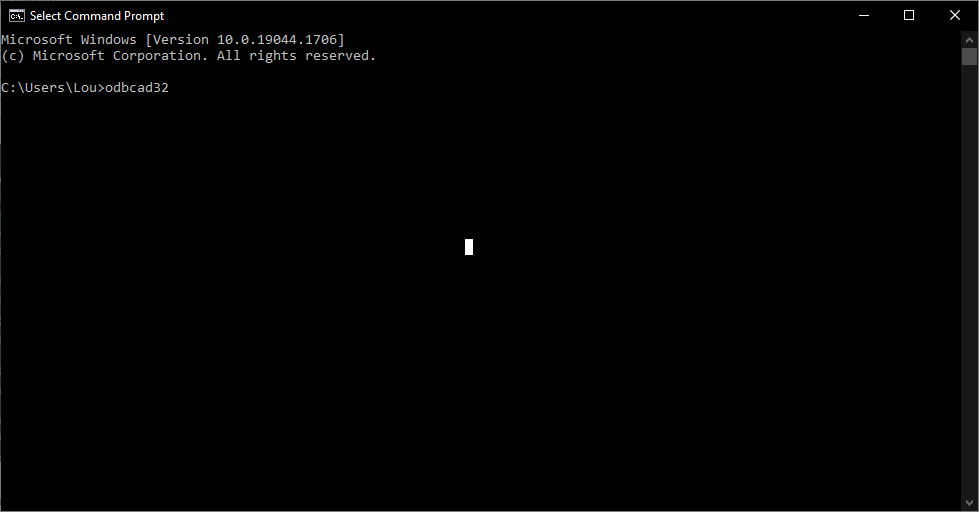
Step 4: Add a New ODBC Data Source
-
In the ODBC Data Source Administrator window, click Add.
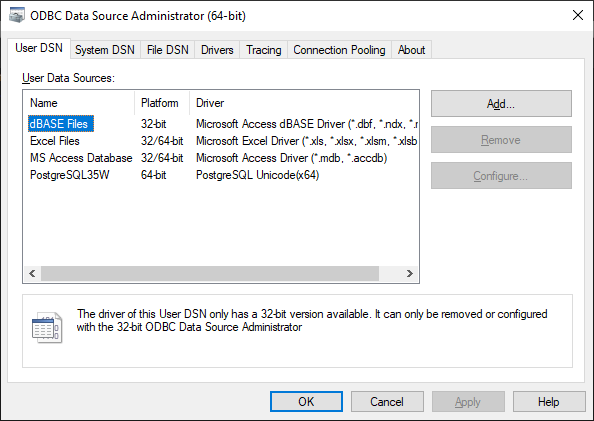
-
Select the PostgreSQL ODBC Driver:
- Choose PostgreSQL Unicode - 64 bit (or 32-bit depending on your system).
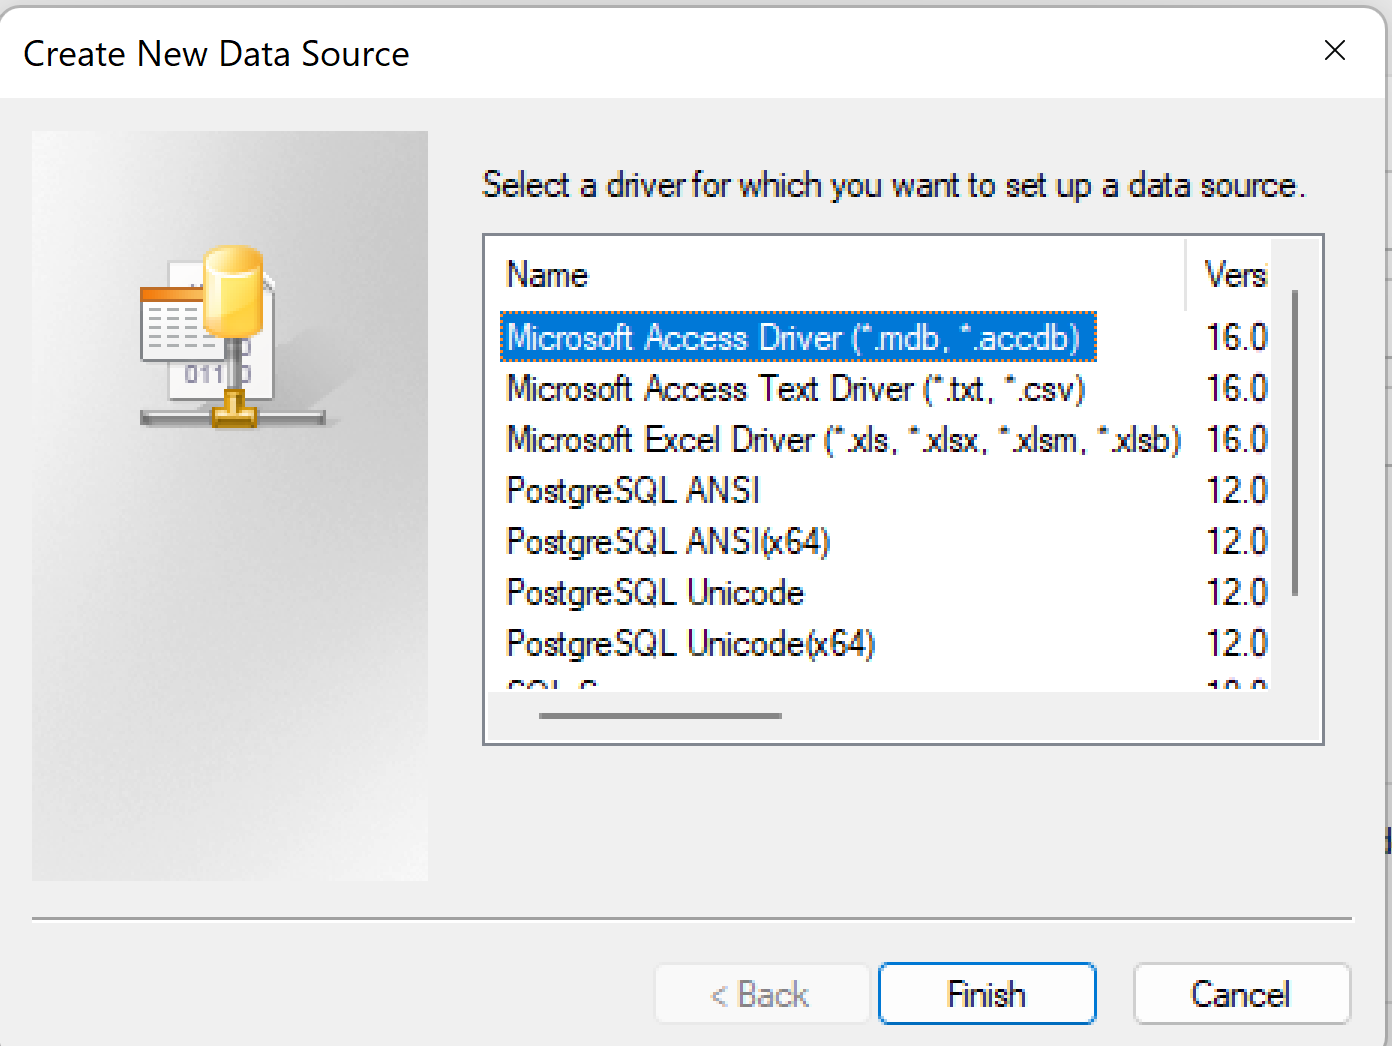
- Choose PostgreSQL Unicode - 64 bit (or 32-bit depending on your system).
Step 5: Configure the ODBC Data Source
-
In the configuration window, enter the credentials from the Evergiving EBIC export builder.
-
To get the credentials:
- Go to Evergiving > Export > Select EBIC Export.
- Scroll down to the EBIC Connection Details section and copy the credentials.
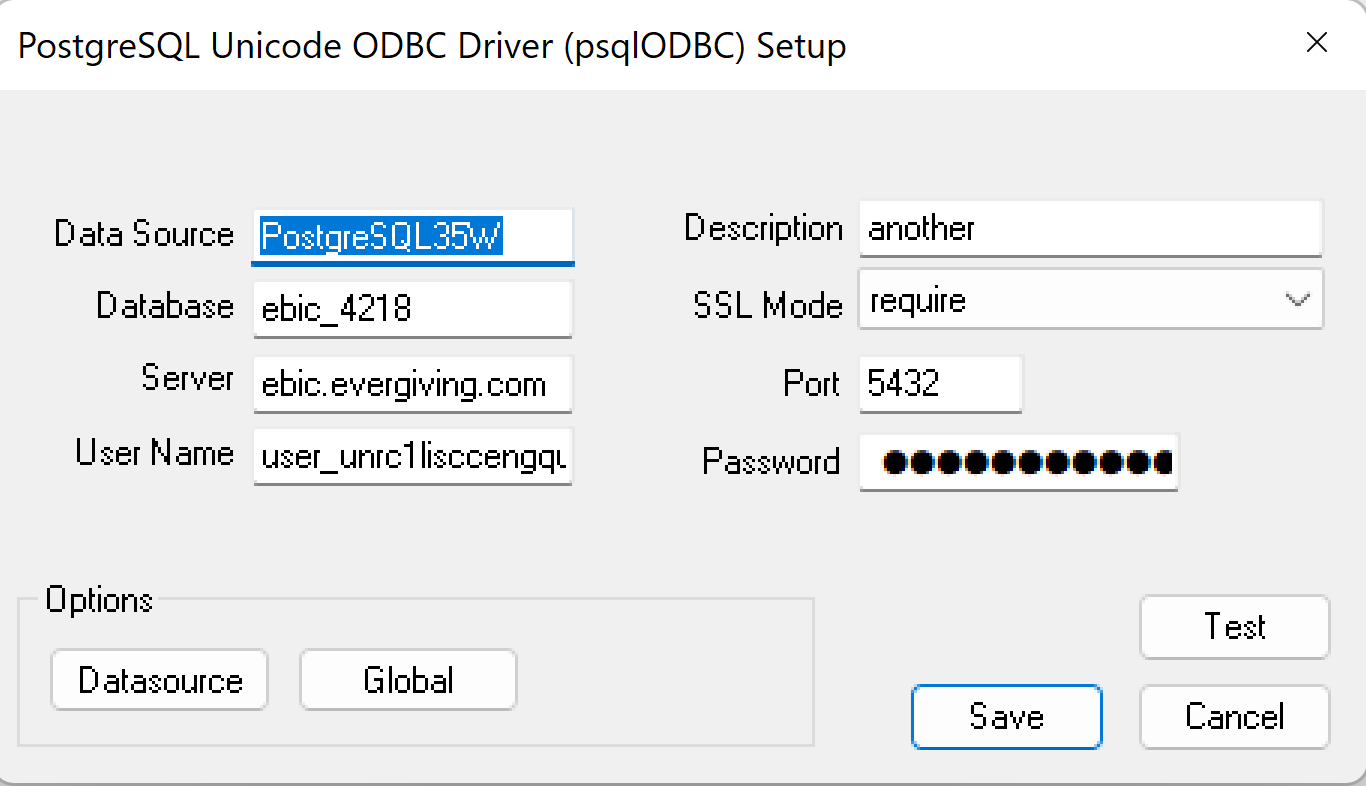
- Click Test to check the connection.
Step 6: Save the Data Source
- If the test is successful, a pop-up message will confirm the connection.
- Click Save.
Step 7: Open Power BI and Get Data from ODBC
-
Open Power BI Desktop.
-
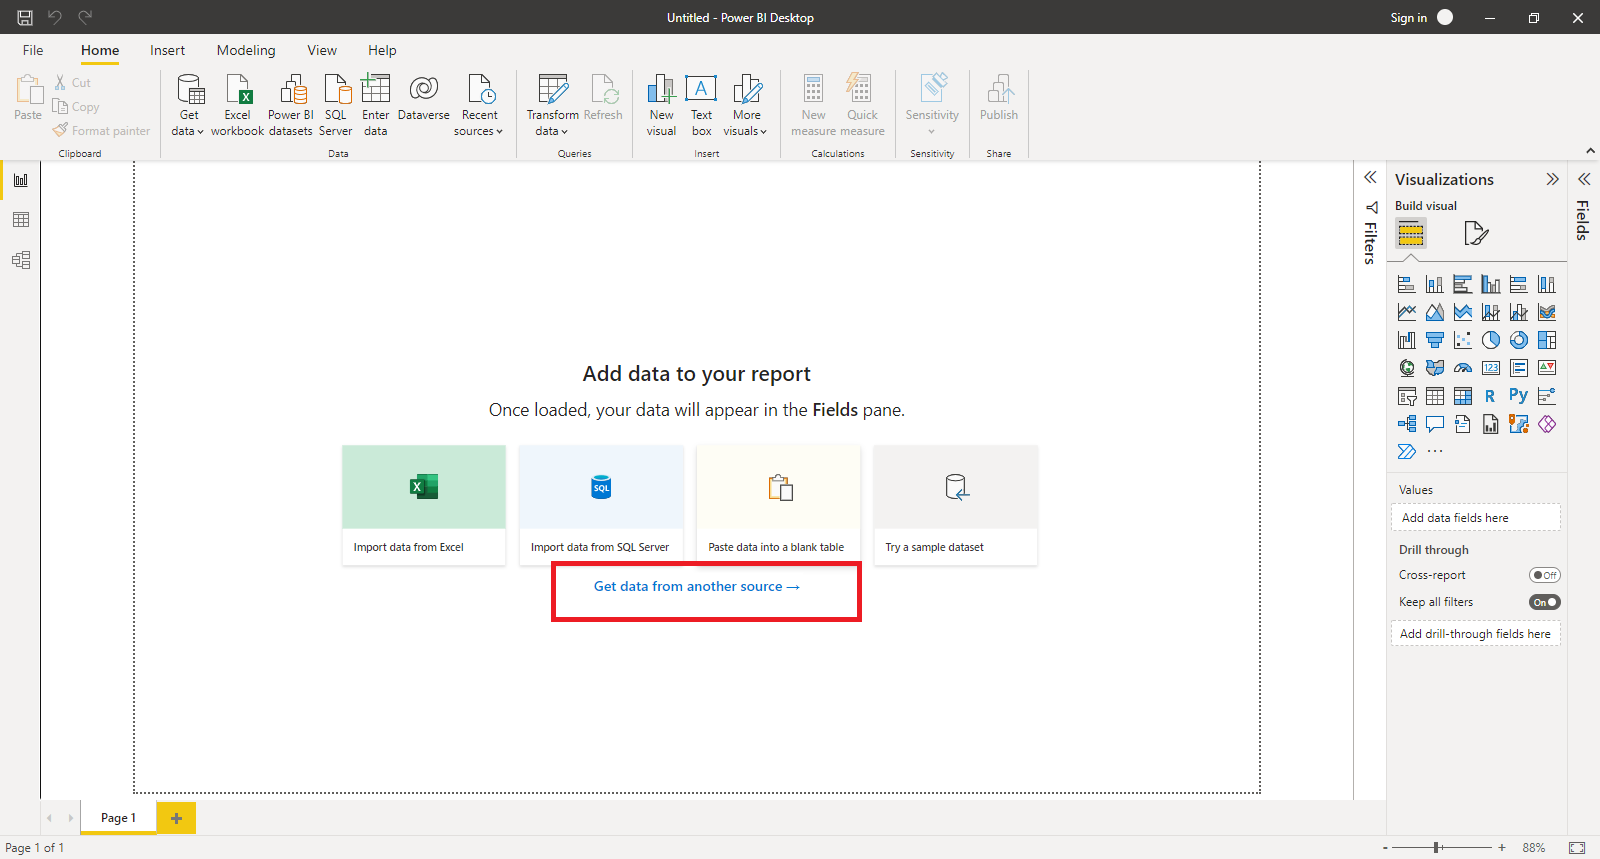
Click on Get Data from Another Source.
-
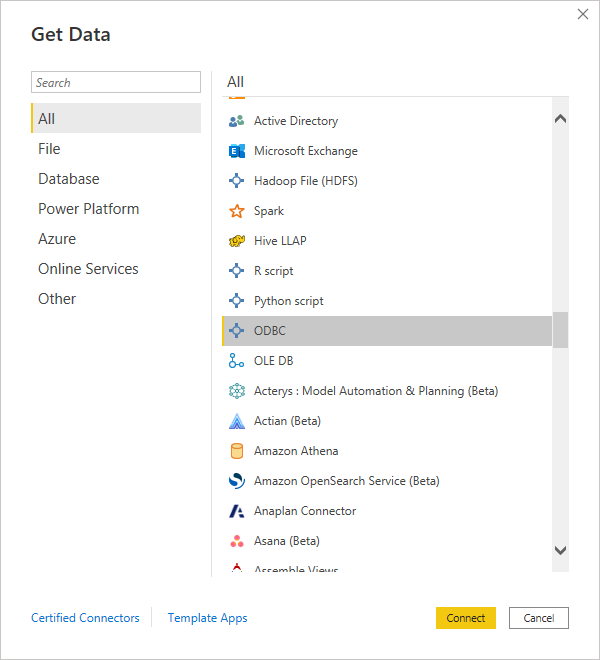
In the list of available data sources, search and select ODBC.
Step 8: Connect to the ODBC Data Source
- Click Connect.
- In the pop-up window, select the data source you configured earlier.
- Click OK.

Step 9: Load Your Data
- Your data will start loading into Power BI.
- You can now visualize and analyze your Evergiving data in Power BI.