Integrate Salesforce
Enter Credentials in Evergiving
Now bring your Salesforce credentials into Evergiving to complete the connection. There are two authentication types available — choose the one that matches your setup.
Add a Salesforce connection
- Log in to Evergiving and go to Accounts > Salesforce.
- Click Add Salesforce Connection in the top right.
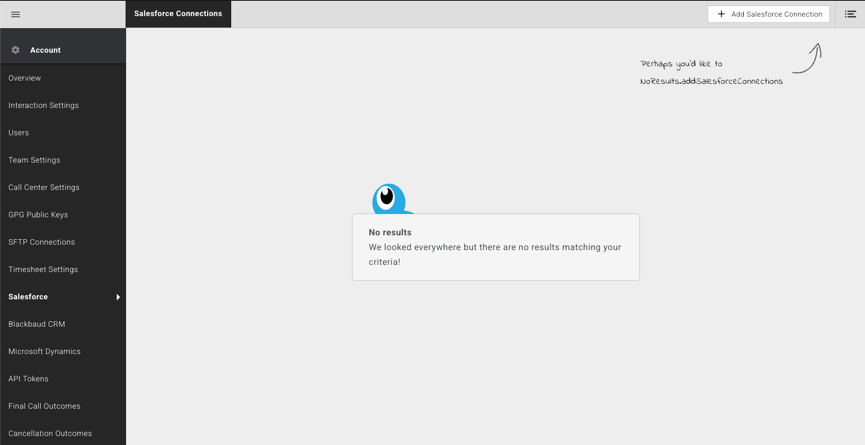
A pop-up window will open for you to enter the connection details.
- Give the connection a name.
- Select the authentication type that applies to you.

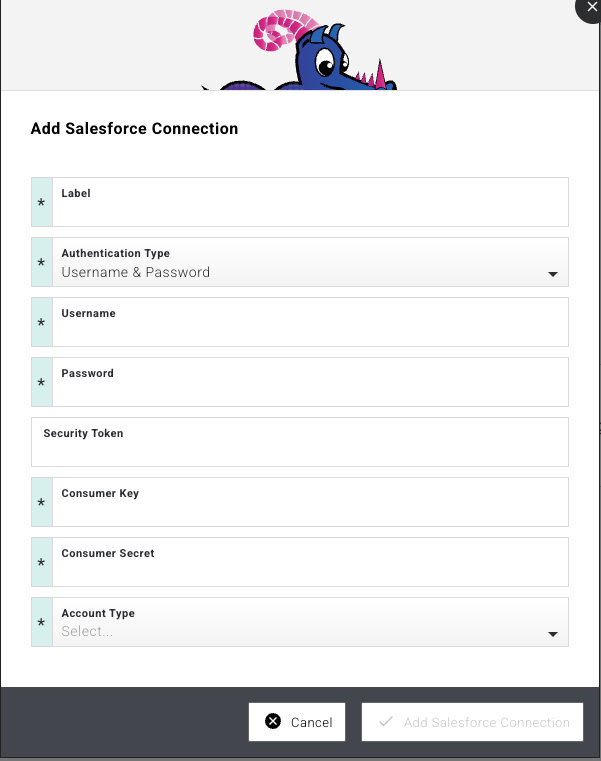
Username and Password
Use this option if you are connecting via the Evergiving Connector app.
- Select authentication type Username and Password.
- Enter your Username, Password, Security Token, Consumer Key, and Secret Key.
- Select the Account Type — either Production or Test (Sandbox).
- Click Add Salesforce Connection to save.
Warning
If you reset your Salesforce user password, you will need to generate a new security token and update it here. Return to Accounts > Salesforce and update both the password and security token on the connection before your next export.
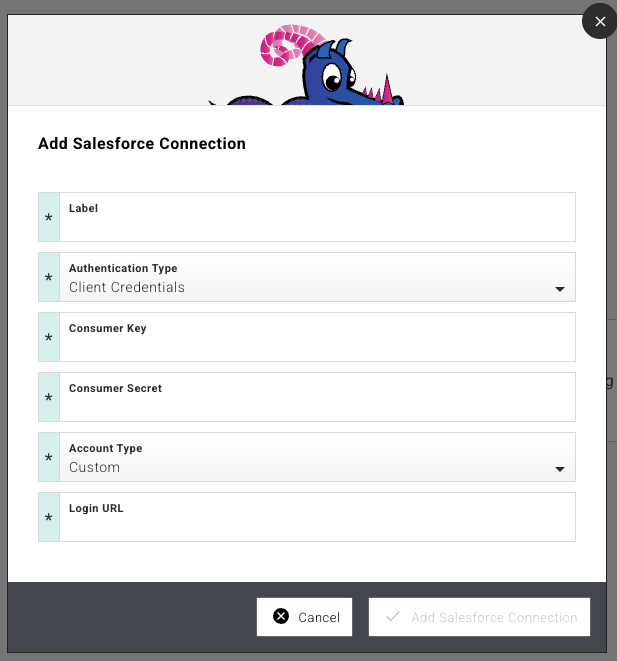
Client Credentials
Use this option if you are connecting via an external client app.
- Select authentication type Client Credentials.
- Give the connection a label.
- Enter your Consumer Key and Secret Key.
- Select Custom URL and enter the URL pointing to your external client app.
- Click Add Salesforce Connection to save.
The connection is now created and ready to use. Our support team can review your connection to ensure everything looks correct.
Link Your Salesforce Connection in Export Builder
With your Salesforce connection saved, the next step is to link it to an export schema so that donor data flows through to Salesforce.
- Go to Export > Donors.
- Select an existing export schema or create a new one.
-
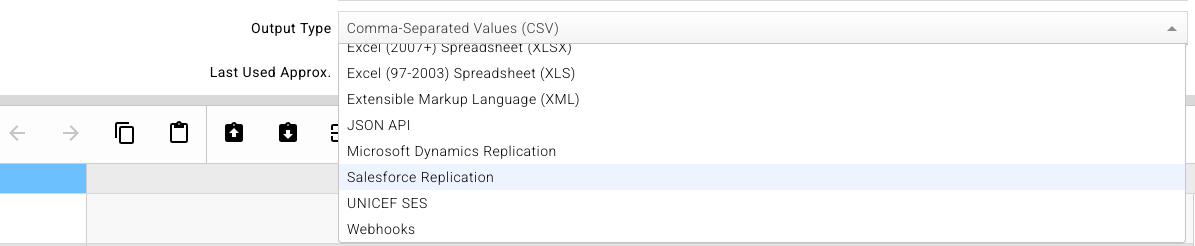
In the Output Type field, select Salesforce Replication.
-
Expand the Salesforce section.
- Select the Salesforce connection you just created.
- Enter the Object Name and any Salesforce External Reference ID required.
- Click Save.

Your Salesforce connection is now linked to the export schema and ready to use.
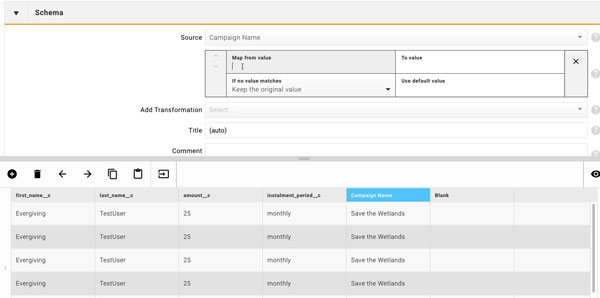
Map Your Data Fields
The final step is to define how your data flows between the platforms. Our support team will handle the technical setup for you.
What We'll Do Together:
- You provide: the object name, the API names of column headers of the schema, as well as the definition and constraints of expected values for each column
- We handle: The technical configuration and object mapping
- We schedule: A setup call to test everything together
Tip
We highly recommend testing your data flow in a Salesforce Sandbox first before going live in Production. This allows us to test the flow and the schema without impacting your active CRM.